Ignition Coil Replacement On A Leaf Blower

This blog is a step-by-step instruction for replacing the ignition coil on an Echo leaf blower. The most common reason for replacing the ignition coil is when the leaf blower engine won’t start.
Replacement
Before you begin the replacement, you need to make sure the engine and muffler have cooled and the on/off switch is in the off position. You also need to remove the wire and boot from the spark plug to prevent the engine from accidentally starting.
Step 1: Now use a 3/4 inch socket or a spark plug wrench to help loosen and remove the plug. Now use a t25 Torx bit screwdriver to unthread the mounting screws securing the engine cover.
Step 2: With the screws removed, carefully detach the cover. Next, remove the blower tube if still intact.
Step 3: Now unthread all of the screws securing the blower cover. With the screws removed, pull off the cover and confirm that the piston is in the down position, then insert a cord into the cylinder to prevent the piston from moving.
Step 4: Secure the blower wheel and use a thirteen millimeter socket to loosen the blower wheel mounting bolt, then unthread the bolt and remove the blower wheel.
Step 5: Detach the throttle linkage from the trigger and the throttle cable. Remove the trigger, leaving the wires connected, detach the on/off switch from the handle.
Step 6: Use the t25 torx bit screwdriver to unthread the screws securing the engine assembly to the blower housing. With the screws unthreaded, pull the engine assembly out and set it on a sturdy surface.
Step 7: Detach the ignition coil wire, rotate the flywheel magnets away from the coil and remove the mounting screws securing the coil, then pull the old coil off.
Step 8: Prepare the new ignition coil for installation by transferring the wire boot terminal spring and grommet from the old coil to the new one. You can use pliers to help insert the terminal spring into the new wire. Apply a drop of liquid dish soap or rinse aid to assist in fully positioning the boot on the terminal spring and wire.
Step 9: Now align the new ignition coil on the engine and thread the mounting screws loosely. Pull the coil back and tighten the screws. Insert a business card between the coil and flywheel then rotate the flywheel so the magnets align with the coil correct distance from the flywheel. Then retighten the screws and remove the card.
Step 10: Attach the ignition coil wire and align both the coil wire grommet and the spark plug wire grommet on the cylinder shield. Reposition the engine assembly in the blower housing. Rethread and tighten all of the mounting screws. Reseat the on/off switch in the handle with the stop side facing the rear. Make sure the wires are inserted into the grooves on the handle. Realign the throttle trigger on the handle post and make sure the spark plug wire is secured in the groove. Reconnect the hooked end of the throttle linkage to the cable. Confirm that the cable is aligned with the groove in the cable guide, then reattach the opposite end of the linkage to the throttle trigger.
Step 11: Realign the blower wheel on the fan hub. Confirm that the washer is in place on the mounting bolt then rethread the bolt and tighten to secure.
Step 12: Remove the cord from the cylinder. Make sure the blower tube lock is in place, then reposition the blower cover. Thread and tighten all of the screws to secure. Reinstall the blower tube, realign the engine cover and replace the mounting screws to secure the cover.
Step 13: Rethread the spark plug and be careful not to strip the threads by over-tightening. Attach the wire and boot to the plug.
With the reassembly completed, turn the on/off switch to the on position and your leaf blower should be ready for use.
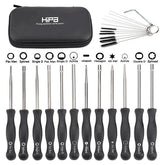
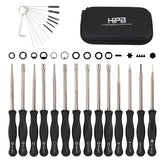
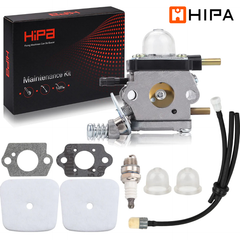
Revive Your Machine With Hipa All-In-One Kit
Hipa's parts kits make it quick and easy to maintain or restore your lawn and garden equipment. Whether you need replacement parts, tools, or help, Hipa has the small machine solution for you.


