Get Your Toro Snow Blower Ready for Winter, Stored in the Spring
After using your snow blower in the Winter, it is important to clean it to prevent rusting over time. Follow these cleaning steps:
- Remove dust, dirt, and oil stains from different parts of the snow blower and apply anti-rust treatment.
- Lubricate each pin and bushing with a grease gun during use within the specified service life. After each operation, check for blade wear.
- Pay attention to blade wear after each work session.
- When the snow removal equipment is rotating, check connecting parts for cracks, looseness, jams, or abnormal noises. Identify and promptly eliminate any issues.
- Follow the equipment maintenance program to inspect and maintain the entire machine. Add lubricating oil to rotating parts to ensure a fault-free system.
- After shutting down, use a high-pressure water gun or other methods to clean the snow blower and dry it. If there are no water marks during drying, store the snow blower in a dry, ventilated, rainproof, and moisture-proof place for future use.
9 Tips To maintain your snow blower:
-
Let the engine burn out the residual oil. Start the engine, close the fuel valve, and let it run until it stops supplying gasoline.
- To avoid future problems, add a suitable amount of fuel stabilizer before each refueling for small engines not used for a long time. Fuel stabilizer is inexpensive and can be used for snow blowers and lawnmowers.
-
Empty the fuel tank in spring by using up or siphoning off the remaining gasoline. There is a screw near the carburetor to drain the remainder. Follow these steps: Close the engine and wait for all moving parts to stop. Pull out the key, unscrew the fuel tank cap, and use a pump-type suction pipe to remove the fuel. Repeat this step until the fuel tank and carburetor are completely empty.
-
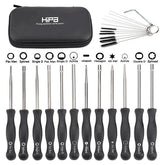
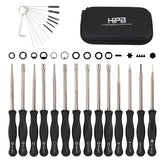
Clean the carburetor to dissolve dirt and residue. The carburetor combines air and fuel for efficient combustion. If it is clogged, it cannot function properly. Follow these steps: Remove the air filter and filter cover to access the carburetor. Use a carburetor cleaner with a nozzle tube to spray into the intake valve. Replace the air filter and filter cover, then try starting the snow blower.
If the engine won’t start, starts then stops, runs rough, or leaks gas and other causes have been ruled out and draining and cleaning the carburetor does not fix the problem. Then, you need replace the carburetor. Learn more details at this blog: https://www.hipastore.com/blogs/snow-blower/carburetor-replacement-on-a-snow-blower
-
Replace the spark plug if the center electrode is black or dirty. Spark plugs are inexpensive, so it's helpful to have spares on hand. Use a socket wrench to remove the spark plug. Check for cracks in the porcelain sleeve. Clean carbon deposits on the electrode with a plug cleaner or carburetor cleaner and a wire brush. Reinsert the plug. If the snow blower still won't start, replace the spark plug.
-
Replace the engine oil according to the snow blower's specific intervals. Use snow blower-specific oil, as ordinary automotive oil may damage the engine.
-
Check for damaged fuel lines. Over time, fuel lines can become hard and brittle, leading to leaks. Leaks prevent the snow blower from starting, so replace the fuel lines if necessary.
-
Replace the drive belt once every season and check its wear level. Follow these steps: Close the engine and wait for all moving parts to stop. Remove the key. Remove the bolts securing the control panel. Lift and hang the control panel. Remove the spark plug wire and empty the fuel tank. Tilt the snow blower forward. Remove the bolts securing the scraper bar. Slide off the old scraper bar and install the new one. Reconnect the spark plug wire and reinstall the control panel.
- Before each season, check the wear of the scraper blade. If the thickness at the bottom is less than 1/16 inch (1.6mm), replace it. Follow these steps: Close the engine and wait for all moving parts to stop. Remove the key. Remove the bolts securing the control panel. Lift and hang the control panel. Remove the spark plug wire and empty the fuel tank. Tilt the snow blower forward. Remove the bolts securing the scraper blade. Slide off the old blade and install the new one. Reconnect the spark plug wire and reinstall the control panel.
By performing these maintenance tasks, your snow blower will last for many years. Remember, proper maintenance is crucial to ensure it starts smoothly in cold winters and to avoid expensive repairs.
Product Recommendation
1. HIPA Air System Maintenance Kit
What is the Hipa Maintenance kit? Hipa Maintenance Kit includes an air filter, fuel filter, oil filter, and spark plug. Include everything you need to replace your degraded air fuel system, all fit perfect. It provides a wonderful solution for homeowners to maintain or tune-up their gas-powered chainsaw.


