How to Make Your MS170 or MS180 Carburetor Adjustable: A DIY Guide
If you're looking to enhance the performance of your Stihl MS170 or MS180 chainsaw, making the carburetor adjustable can be a great modification. In this blog, I'll share my experience on how to achieve this by swapping carburetor bottoms between two compatible models. Please remember, this guide is based on my personal experience, and you proceed at your own risk.
Tools and Materials Needed
Carburetors:
C1Q-S57 / C1Q-S57A / C1Q-S57B (for MS170/MS180)
WT286 / WT-215 / C1Q-S11E / C1Q-S11G (for MS210/MS250)
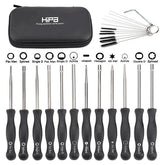
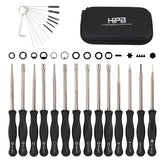
Screwdriver Set

Wrench Set

Clean Cloth

Safety Goggles

Step-by-Step Guide
Step 1: Gather Your Carburetors
Begin by obtaining both sets of carburetors. You will need the bottom section from the WT series carburetor and the top half from the C1Q series.
Step 2: Prepare for Disassembly
Before starting, make sure your chainsaw is turned off and cool. Safety first! Wear goggles and gloves to protect yourself from any fuel residues.
Step 3: Remove the Carburetors
Detach the Carburetor: Use your screwdriver and wrench set to remove the carburetor from the MS170 or MS180. Take note of how everything is connected; it might help during reassembly.
Place on a Clean Surface: Lay the carburetor on a clean cloth to avoid dirt contamination.
Step 4: Disassemble the Carburetors
Open the C1Q Carburetor: Carefully disassemble the C1Q carburetor while keeping the original diaphragm intact.
Remove the Bottom Half of the C1Q: Unscrew and detach the bottom portion of the C1Q carburetor that has a snorkel-shaped feature. This part is crucial for the functioning of the MS170/MS180.

Open the WT Carburetor: Similarly, disassemble the WT carburetor to access its bottom section.
Step 5: Swap the Bottoms
Replace the Bottom: Attach the bottom half of the WT carburetor to the top half of the C1Q carburetor, ensuring the original diaphragm remains in place.
Secure Everything: Reattach screws carefully to avoid cross-threading. Ensure all parts fit snugly without excessive force.
Step 6: Reinstall the Modified Carburetor
Now, it's time to put the modified carburetor back onto your MS170 or MS180:
Reconnect: Follow the steps you noted earlier to reconnect the carburetor securely.
Check for Leaks: Before starting the chainsaw, check for any fuel leaks around the carburetor area.
You may need to drill the chainsaw plastic shell to ensure the adjustable screws can be reached.
Congratulations! You've successfully made your MS170 or MS180 carburetor adjustable by swapping the bottoms with a compatible WT carburetor. This modification can improve your chainsaw's performance, allowing for better tuning and efficiency.
Disclaimer
This blog shares my personal experience and does not guarantee results. Modifying your carburetor may void warranties or cause damage if not done correctly. Proceed at your own risk and consider consulting a professional if you're unsure about any steps.
We'd like to invite you to join HIPA DIY COMMUNITY to feature your passion for repair projects, share your stories with the Hipa family and get help from Hipa.


